What Images Colour will be Changed?
For part of my post production, I aim to transform the colour of the rose from red to black. This is mainly to show the symbolism which I've previously mentioned - changing from red to black helps to symbolise the death of the male character.This colour changing will be used for two clips, which are:
- The rose sitting on the bench, turning from red to black
- When the male character hands over the rose, which too turns from red to black.
As I've never done something like this before, I done what I usually do and researched it through YouTube. Below is the YouTube video which I followed.
https://www.youtube.com/watch?v=MTk7LnpPATw
The video goes through how to change the colour on a still image, however explains that this method can also be done on moving image as well. All in all, this video was very helpful and made it look quite easy (however it still took me time to get used to it!) Luckily the video too was on a rose which is similar to mine. However, after watching the video I then attempted it myself.
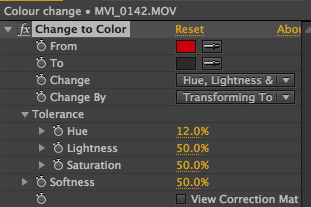
Firstly, I begun with the rose on the bench. I created a new composition and imported the film. Following the tutorial steps, I created a 'colour to colour' effect.

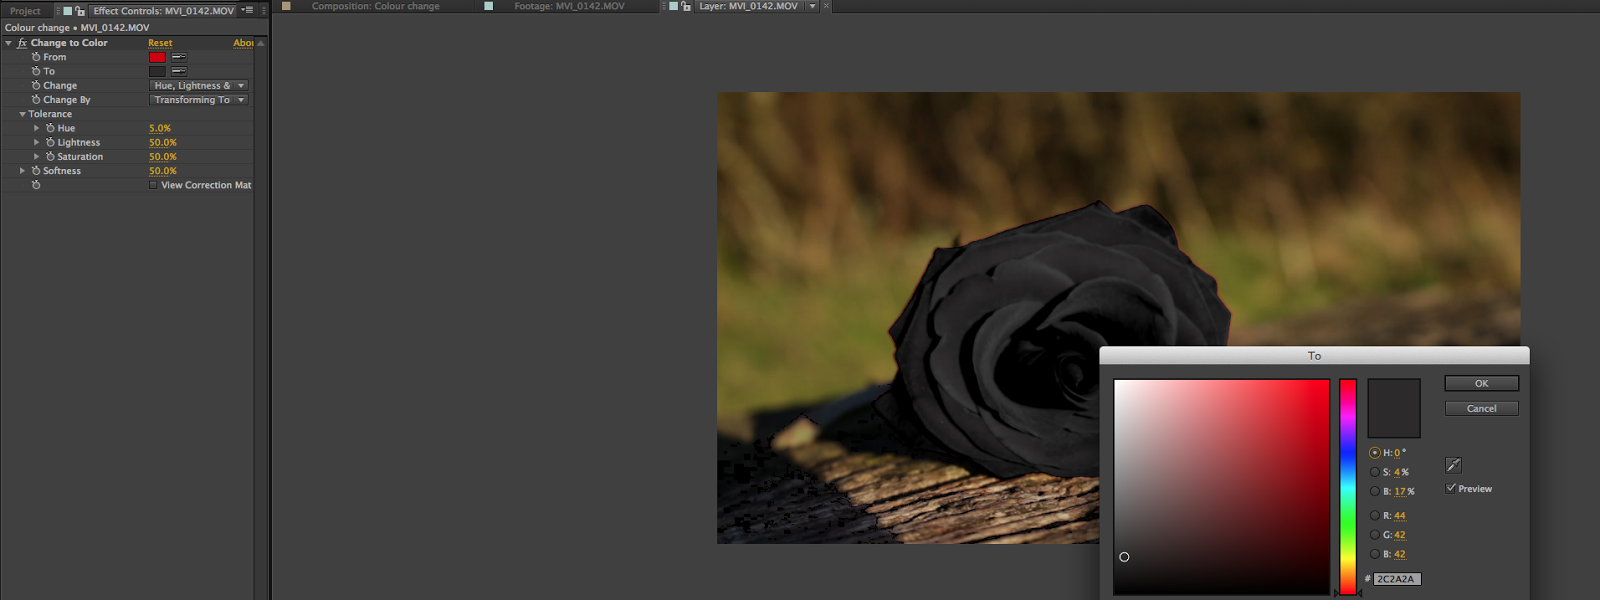
 I then changed the 'colour to' to black, the colour which I want my rose to be. At first the rose didn't come out black for some reason (which it did on the tutorial), so I had a play around with the hue settings to see if it would work, which it eventually did when I changed the colour to change on 'hue, lightness and saturation'. I then carried on altering the hue, lightness and saturation settings until the rose looked realistic.
Now that my rose is black, I then created key frames to enable the rose to eventually turn from red to black. I gave a few seconds before it turned black so you can see it change better. You can see the key frames in the image to the right.
And there we have it, the rose turns from red to black whilst the background stays the same. At first I thought this would be very time-consuming and complex however it is quite basic. Below are some screen shots of the rose when it was red, turning black and then finally staying black. I've also decided to use this scene as my credits as I couldn't find any use of it for the story itself, as it looked a bit odd watching a rose on a bench turn from red to black (didn't seem very relevant to the story).
 |
| Begins red... |
 |
| Changing to black... |
 |
| Final product! |
 |
| Print screen of it being used for the credits. |
https://www.youtube.com/watch?v=v9L226SGxL8
This video shows how to change colour on moving image by demonstrating it on a car. It is quite similar compared to the previous tutorial - it uses the same method for the colour change however shows how to focus the colour change on the exact piece you want, which is useful if there is a similar colour also evident in the image.
The main difference is that this tutorial uses masks to show you how to remove colour change which you don't This is needed for my film as the cross on the nurse outfit is also red, meaning this will change colour when the rose changes colour, so I'll need to learn how to use masks to stop this happening.
Once again, I opened a new composition and imported the right clip. I added the colour to colour effect however now I then created a mask around the cross, as well as pressing the automatic key frame tool. At first, I created the mask around the rose and tried inverting it, so that the rest of the image won't change colour when the rose does. However, this didn't work so I went back to the red cross. (I forgot to take print screens though so the invert will be used as an example instead).
 |
| Beginning to mask the rose |
Once the mask was created, I then changed the effect to subtract so that it cuts out this part of the image. I then duplicate the layer and deleted the effects on the duplicate. This enables the cut out part from the mask to show again, however because of the mask, it means that the red cross won't change colour when the rose does.
 |
| Here you can see the mask effect, and that it has been changed to 'subtract' |
The next part now is to go through each frame on the clip to make sure that the red cross always stays in the mask - if it doesn't stay inside then the cross will change when the rose does. Once this has been completed for all the clips, the next stage is to key frame it.
 |
| Masking around the rose |
The key frame is the same method as the following video, however I made the rose change colour around half way through the clip - at the point when the rose is positioned into the female character's hand.
 |
| Here you can see the mask on the red cross (not the rose) |
Now that's its finished, I exported it onto Final Cut and placed it where I want it. I thought this would be effective if I use it for the flashback scene of when the female character breaks down after finding out the death of her husband, as this helps to reinforce her loss. I also slowed it down as well just for extra effect.
 |
| Added onto FCP |


0 comments:
Post a Comment